Storyboard & Animatic
Cameras
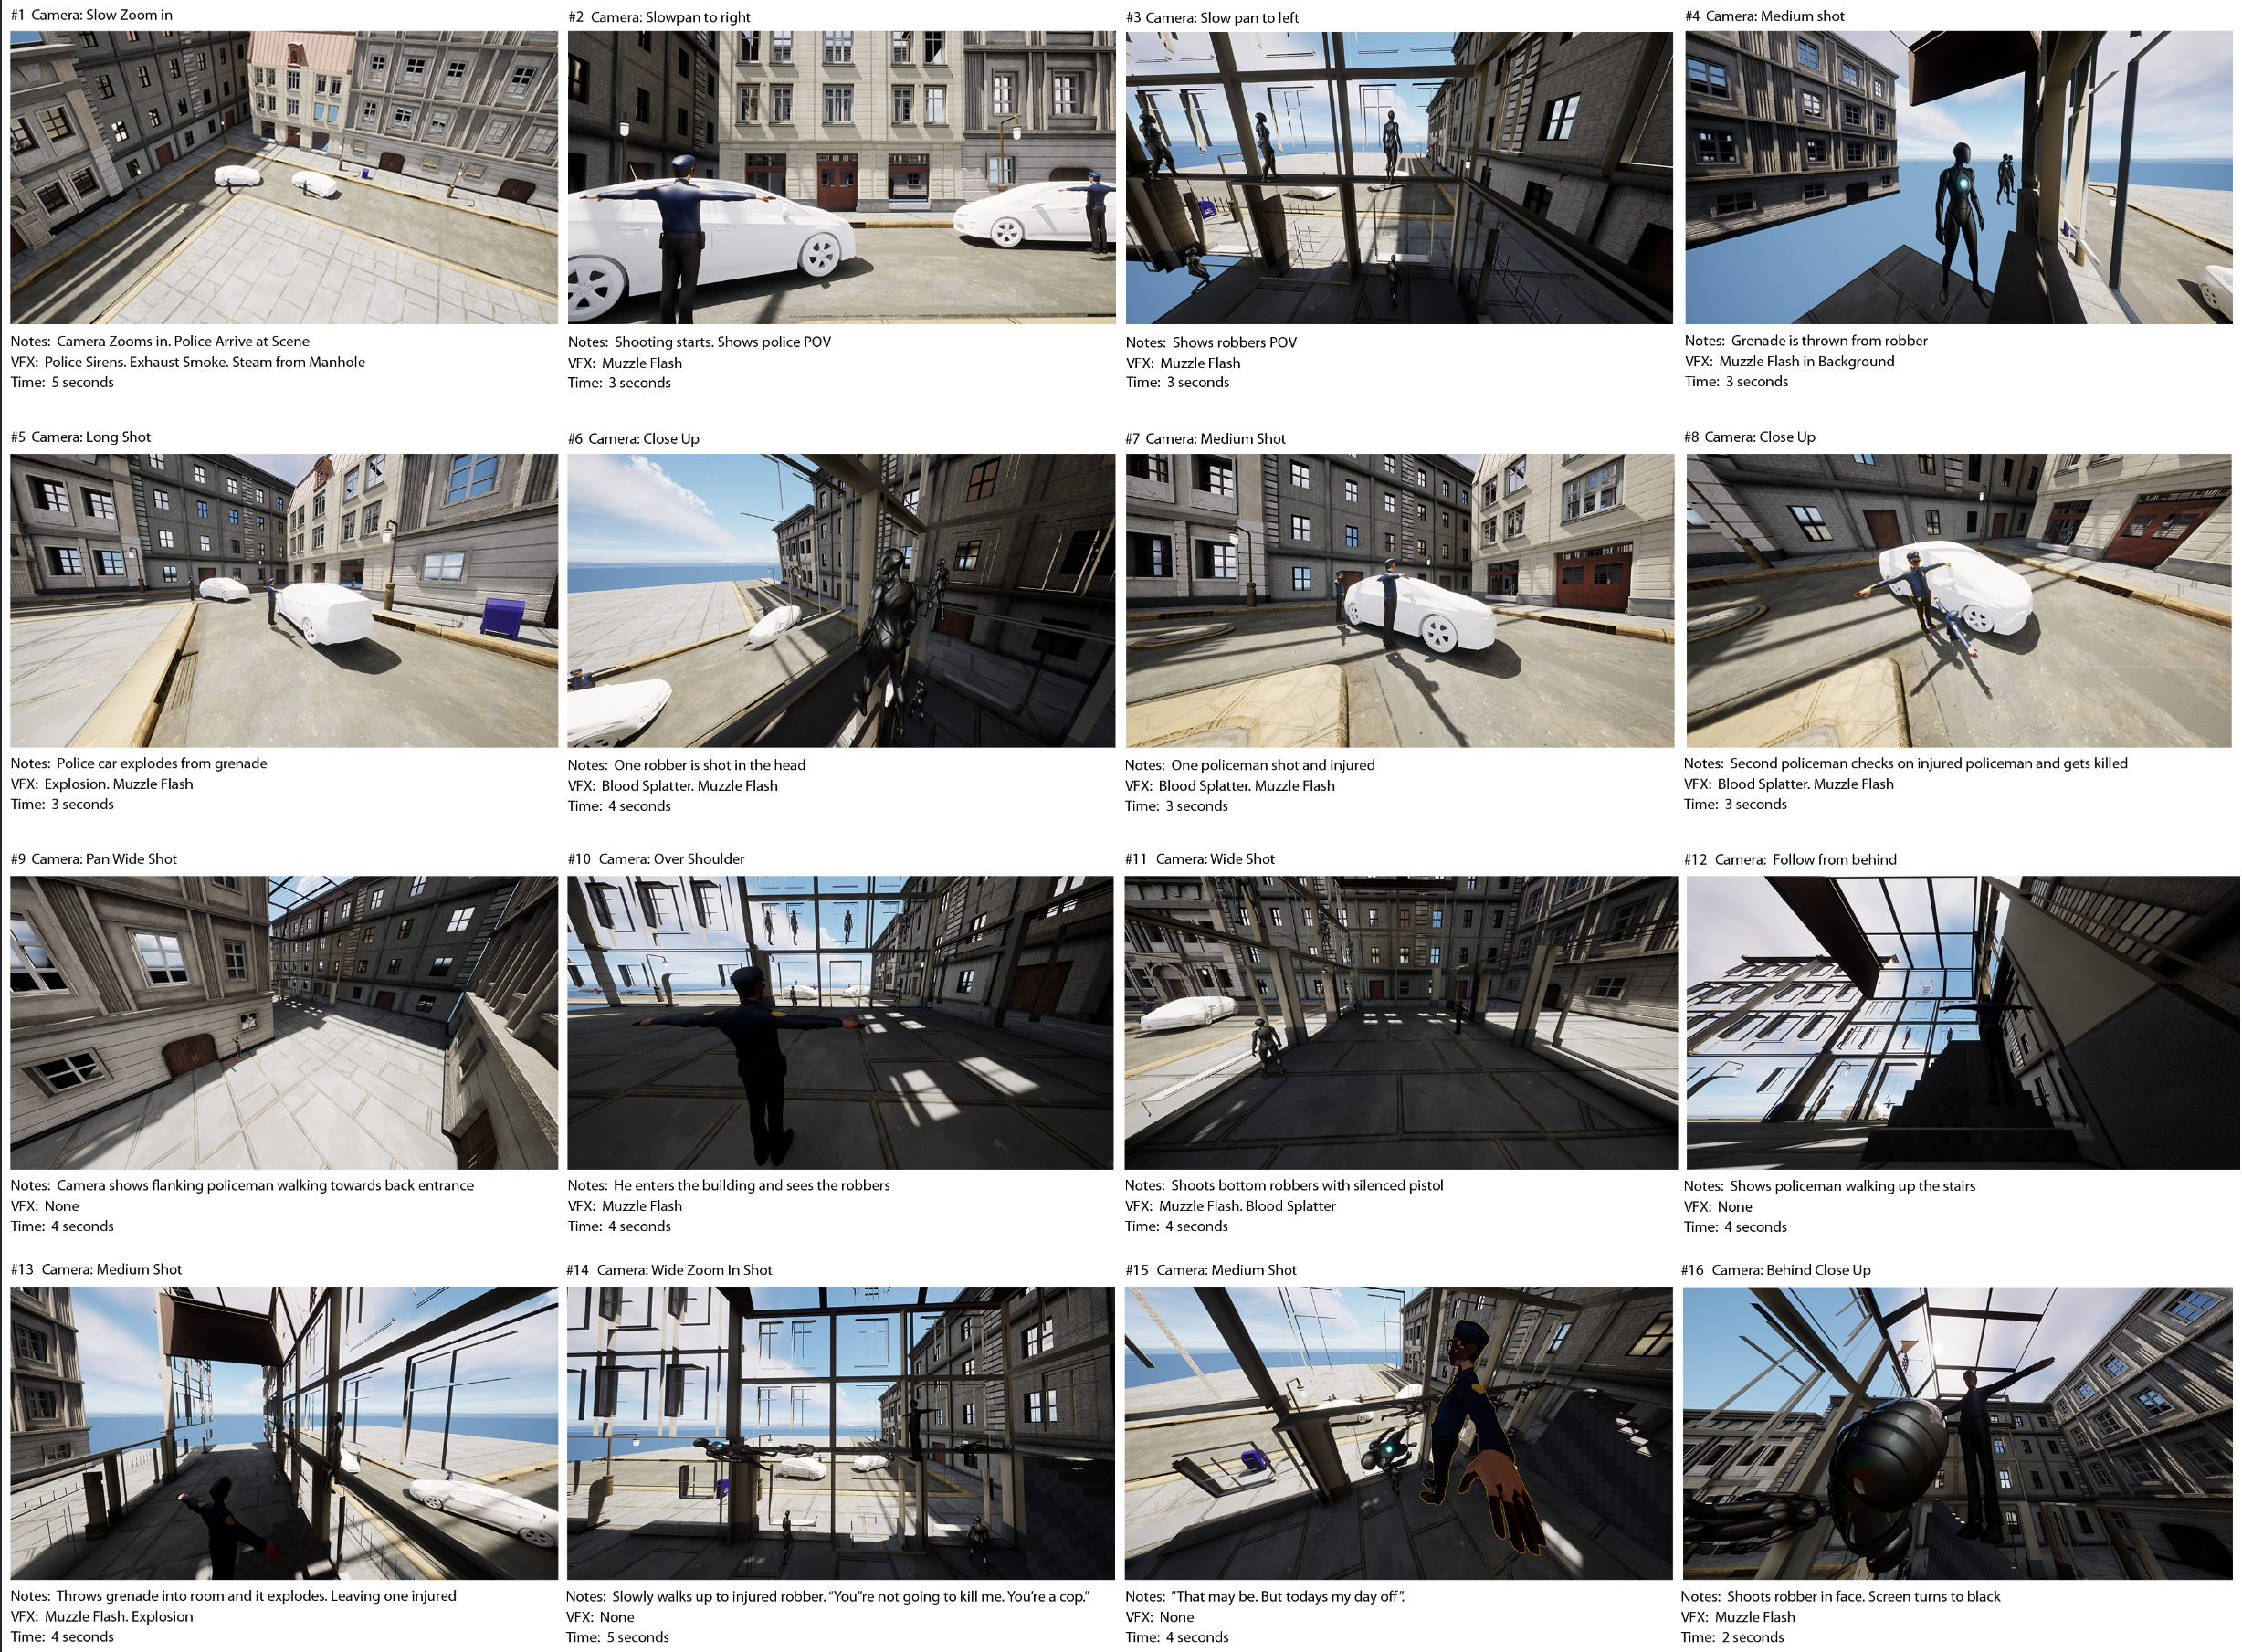
In my storyboard, there are a range of shots and movements used. I felt that each one provided a purpose to the scene, instead of using one camera shot throughout the whole sequence. Additionally, I chose camera movements to make the sequence feel more dynamic and less static. As I feel that having no camera movements would be very boring for the viewer.
Furthermore, I wanted to follow the basic composition rules in the sequence. Such as keeping the action at an eye level for the viewer, keeping the characters within the rule of thirds grid and creating headroom for the majority of shots.
Style
I chose to capture screenshots of my scene in Unreal Engine instead of drawing the shots. I chose this method because my ability of creating scenes in Unreal Engine is far superior to my artistic ability of drawing. Additionally, another advantage of creating the scenes in Unreal Engine is that the scenes will be more accurate to the final cut of the sequence.
I set out to keep my storyboard to a professional standard. I believe I followed this standard by adding details to each shot. Details including:
- Shot Number
- Camera Shot Type
- Timings
- VFX
- Additional Notes
These details allow the workflow to be much quicker, when working in Unreal Engine. Since I would be able to reference the storyboard and see what each shot will include, and how long it would be.
Below is my storyboard for my VFX Sequence.
Animatic
I created an Animatic of my storyboard. However, I could only include five zooms to show camera movement. I knew what movements the characters and cameras would already have in my final sequence. Below is my Animatic of my storyboard.
Leave a Reply