ZBrush
ZSphere
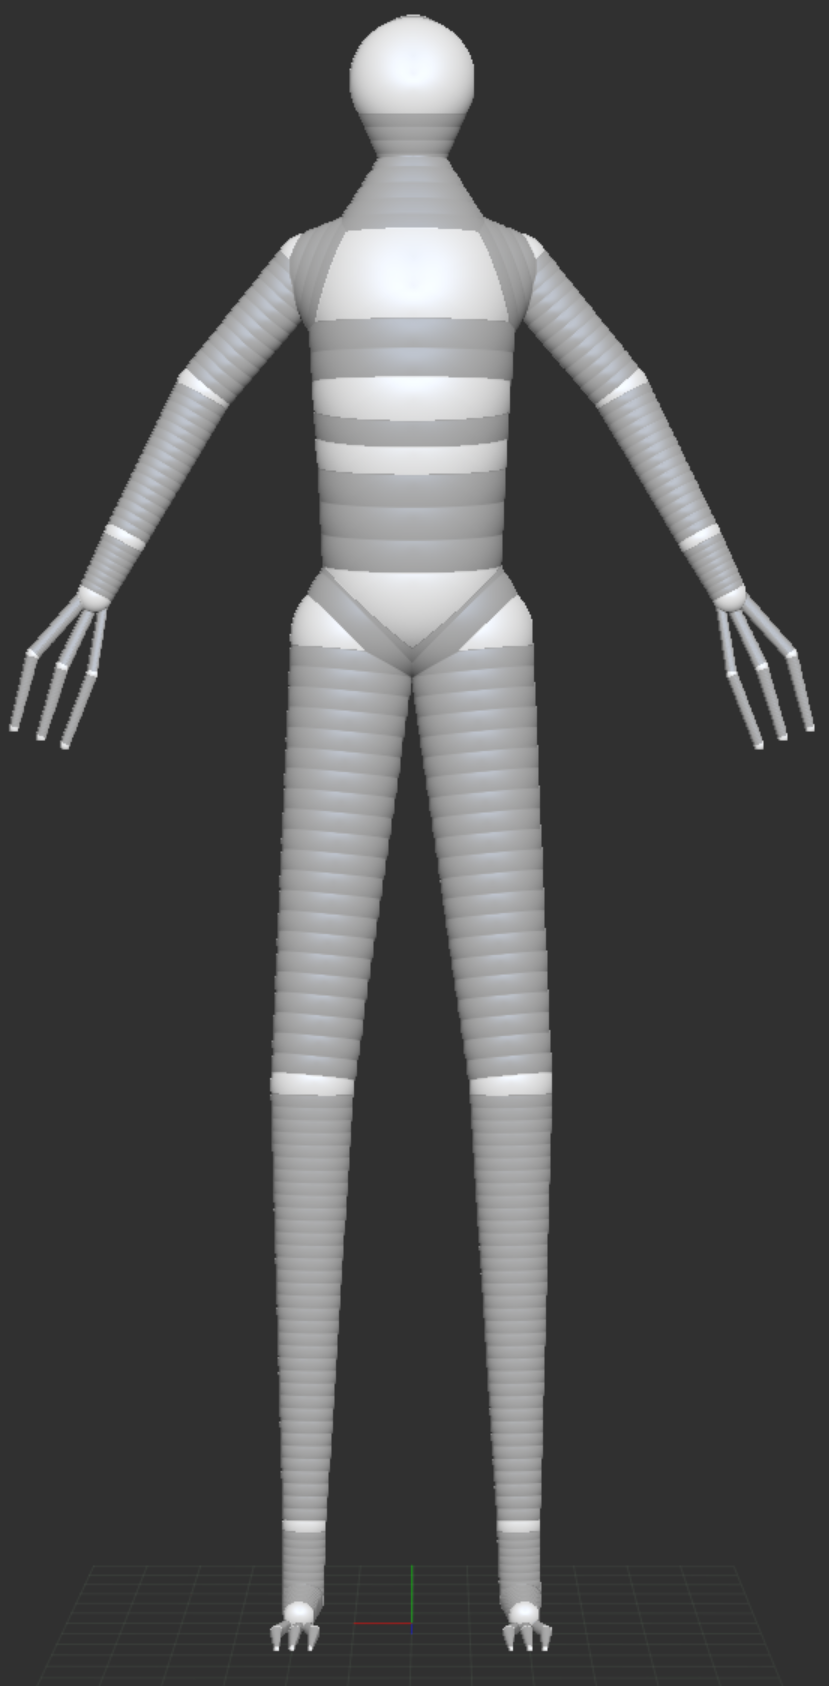
I used the ZSphere method to block out my character’s general shape. I preferred this method to adding primitive shapes, because I felt I had more control over the shape of my character. Using this method made it easy for me to create the body proportions.
Detailing
After I had created the ZSphere block out, I made detail passes on the model using the Dynamesh tool. The Dynamesh tool can increase or decrease the resolution of the mesh, and allows for more creative sculpting. I began with a low poly model and primarily used the Clay Build Up and Move brushes. These allowed me to sculpt and manipulate the mesh, to create the basic anatomy.
I then began to create the muscle structure for the character. Throughout this process I used the Dynamesh tool and the ZRemesher. The ZRemesher recreates the topology for the mesh, and makes it much cleaner. Furthermore, the Smooth tool was used, as I wanted the muscle structure to join smoothly against the model.
Using the move tool, I manipulated the shape of the head to extend it. I also wanted to create an exoskeleton structure on the head, which gave an extra element of deformation. I used the Clay Build Up tool to create the exoskeleton, and simply created loops around the head to give this impression.
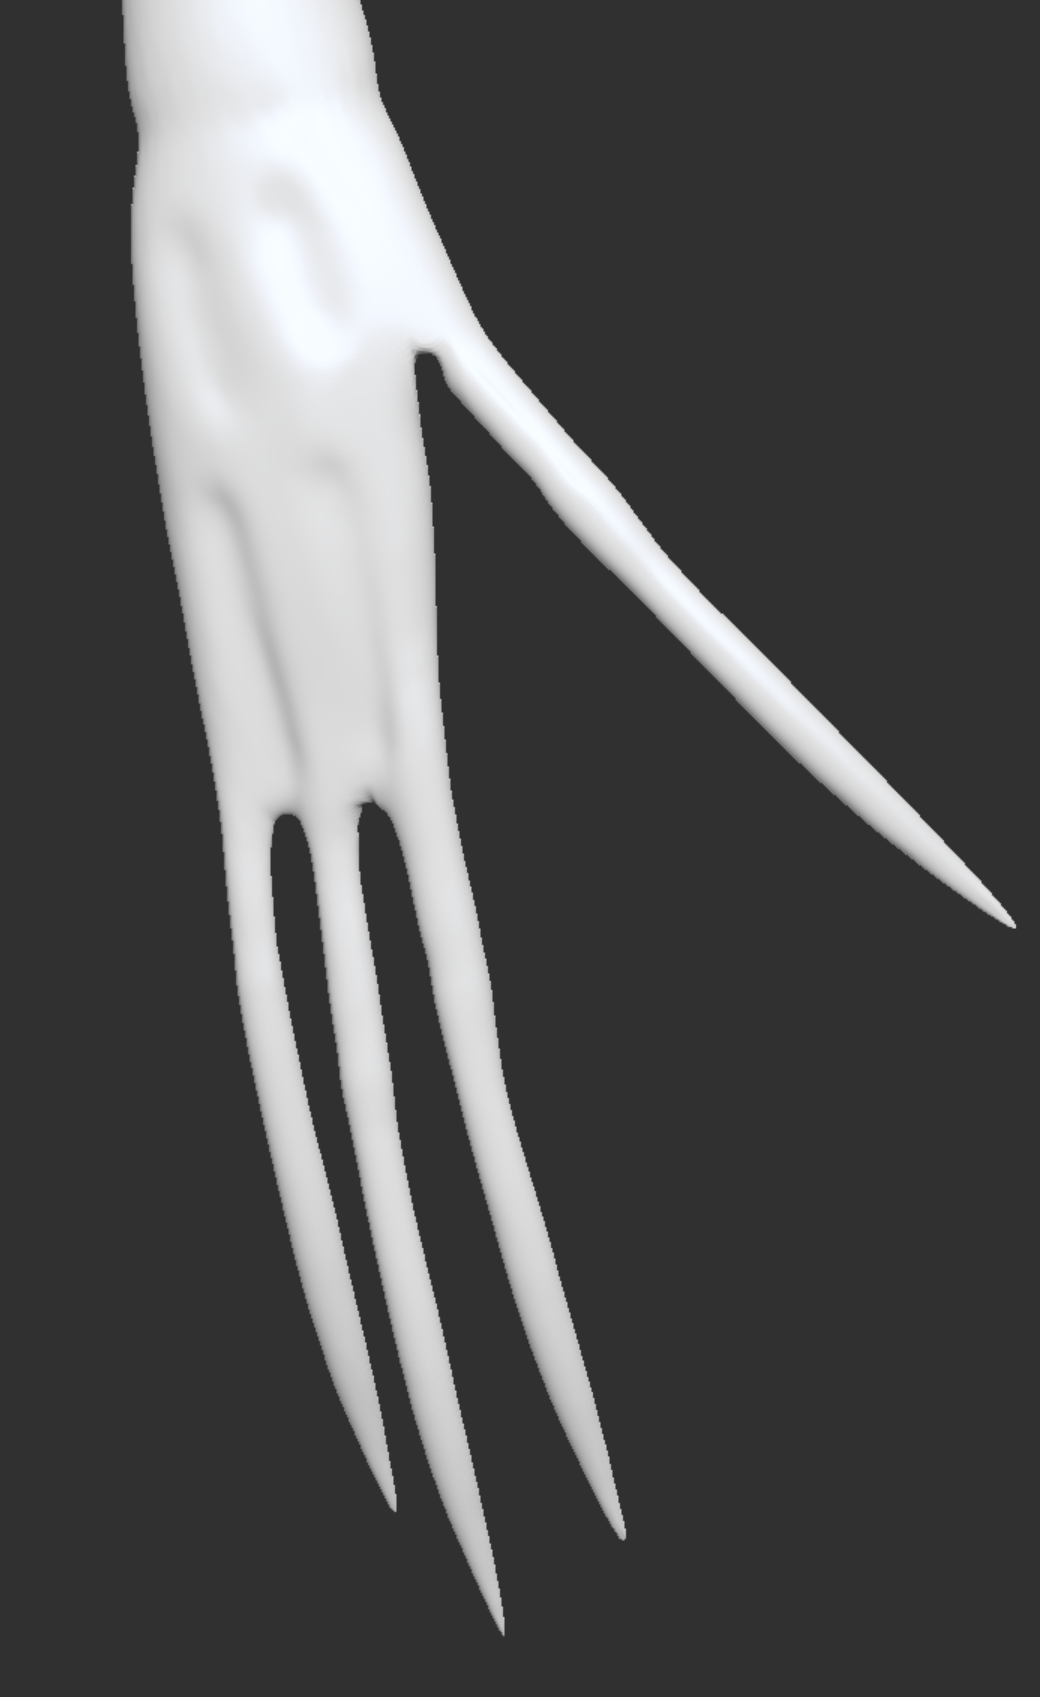
I created the claws by adding primitive cylinders, and then scaling the cylinders. Then using the Mirror And Weld tool, I could then duplicate the shapes onto the other hands. After this, I used the Move Tool in order to further manipulate the shapes, as I wanted the claws to be curved, and then combined them to my model.
From my research I was not inspired from the face of any creature. I experimented with different facial features and shapes, and had combined these features from my concepts. My objective was to create a face which gave off a soulless look. I added primitive spheres for the eyes, and manipulated their shape. Then combined them with the model.
For the teeth, I wanted the character to be able to scream and show their teeth. Initially, I wanted large teeth. However, I chose to use smaller teeth and the characters backstory did not require them to have large teeth, as it does not eat its victims.
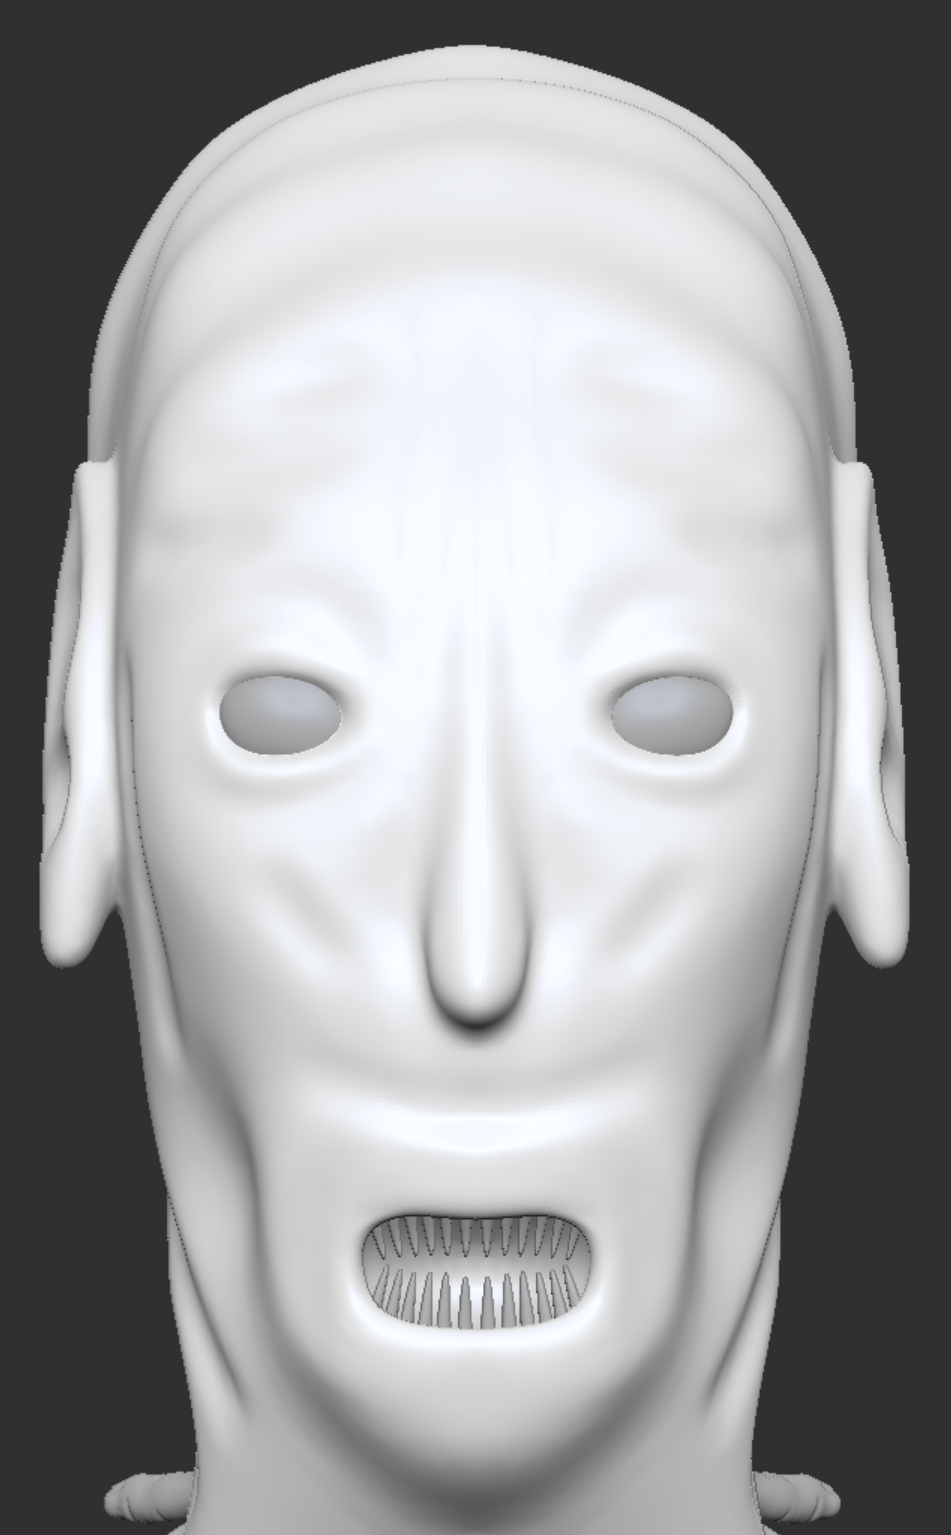
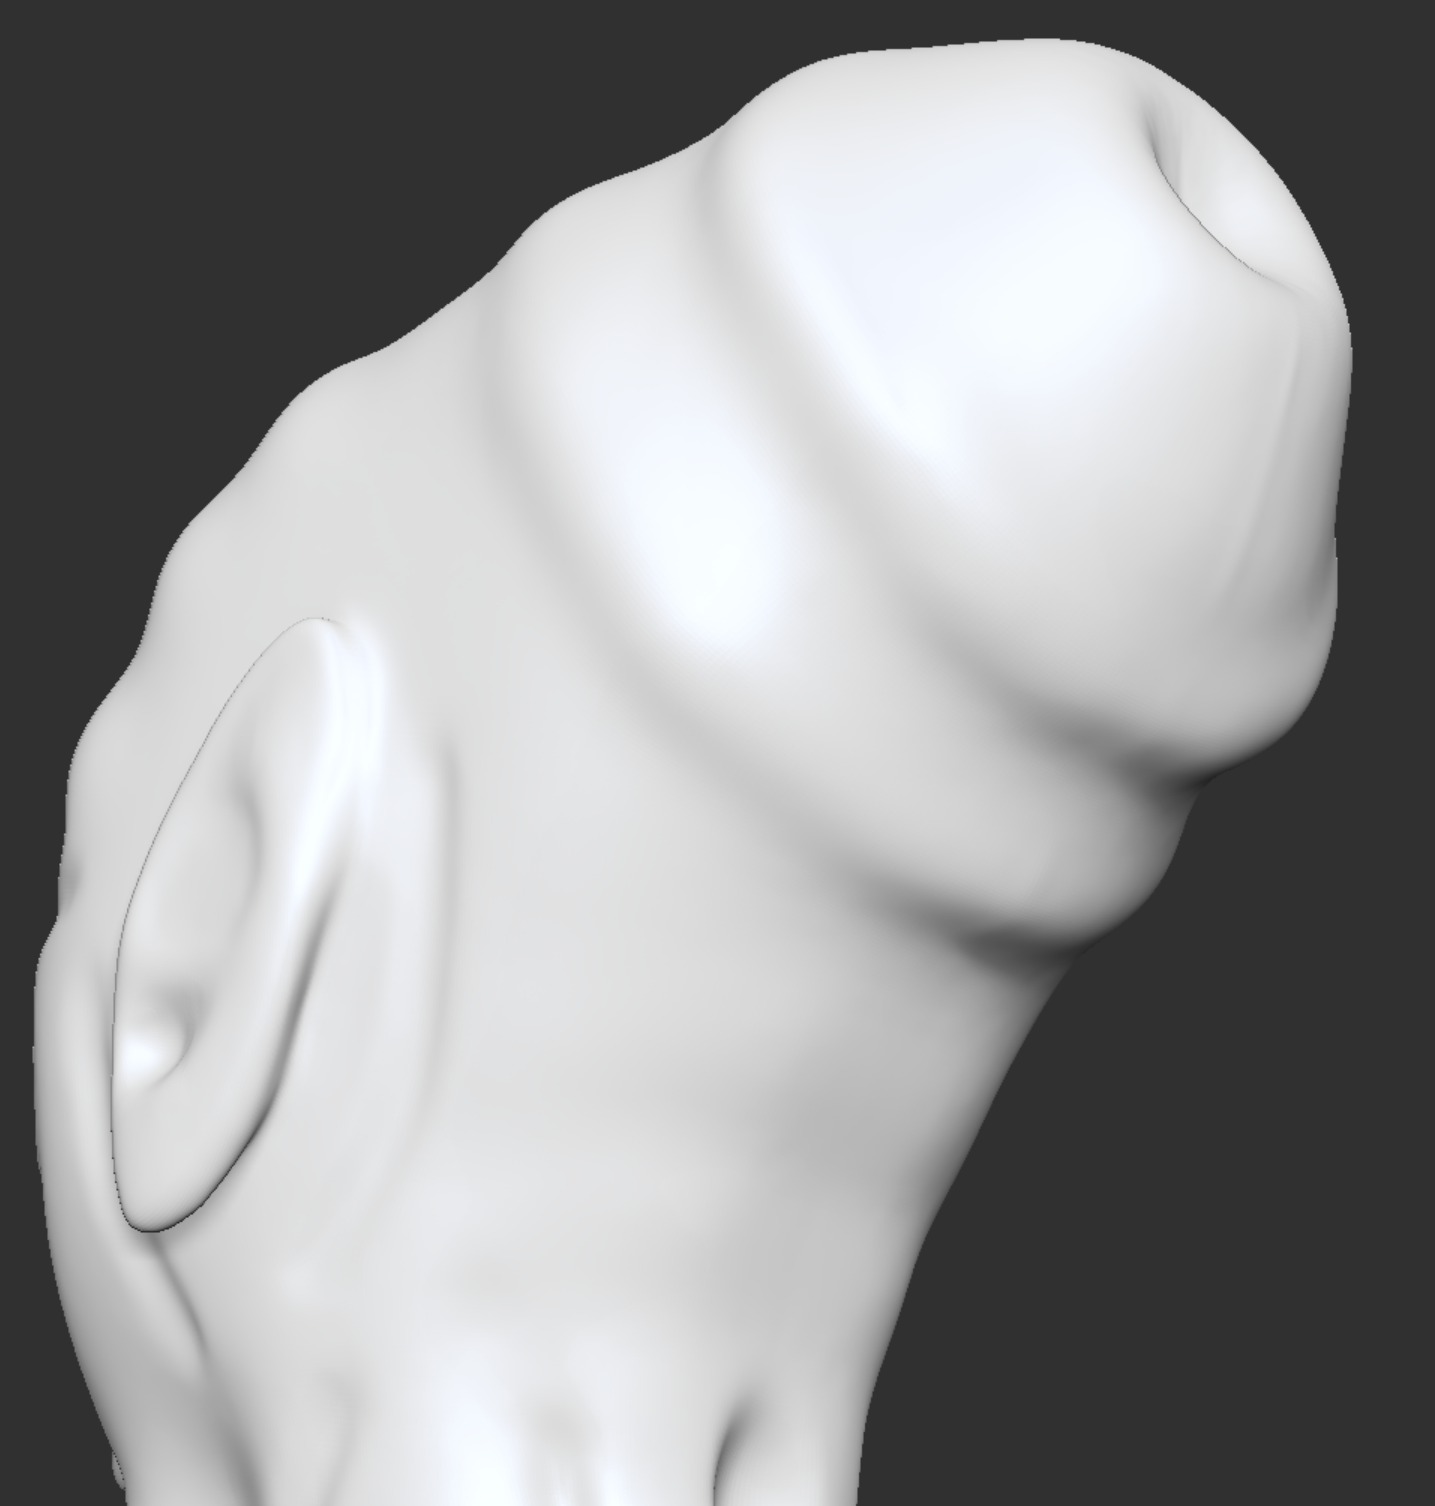
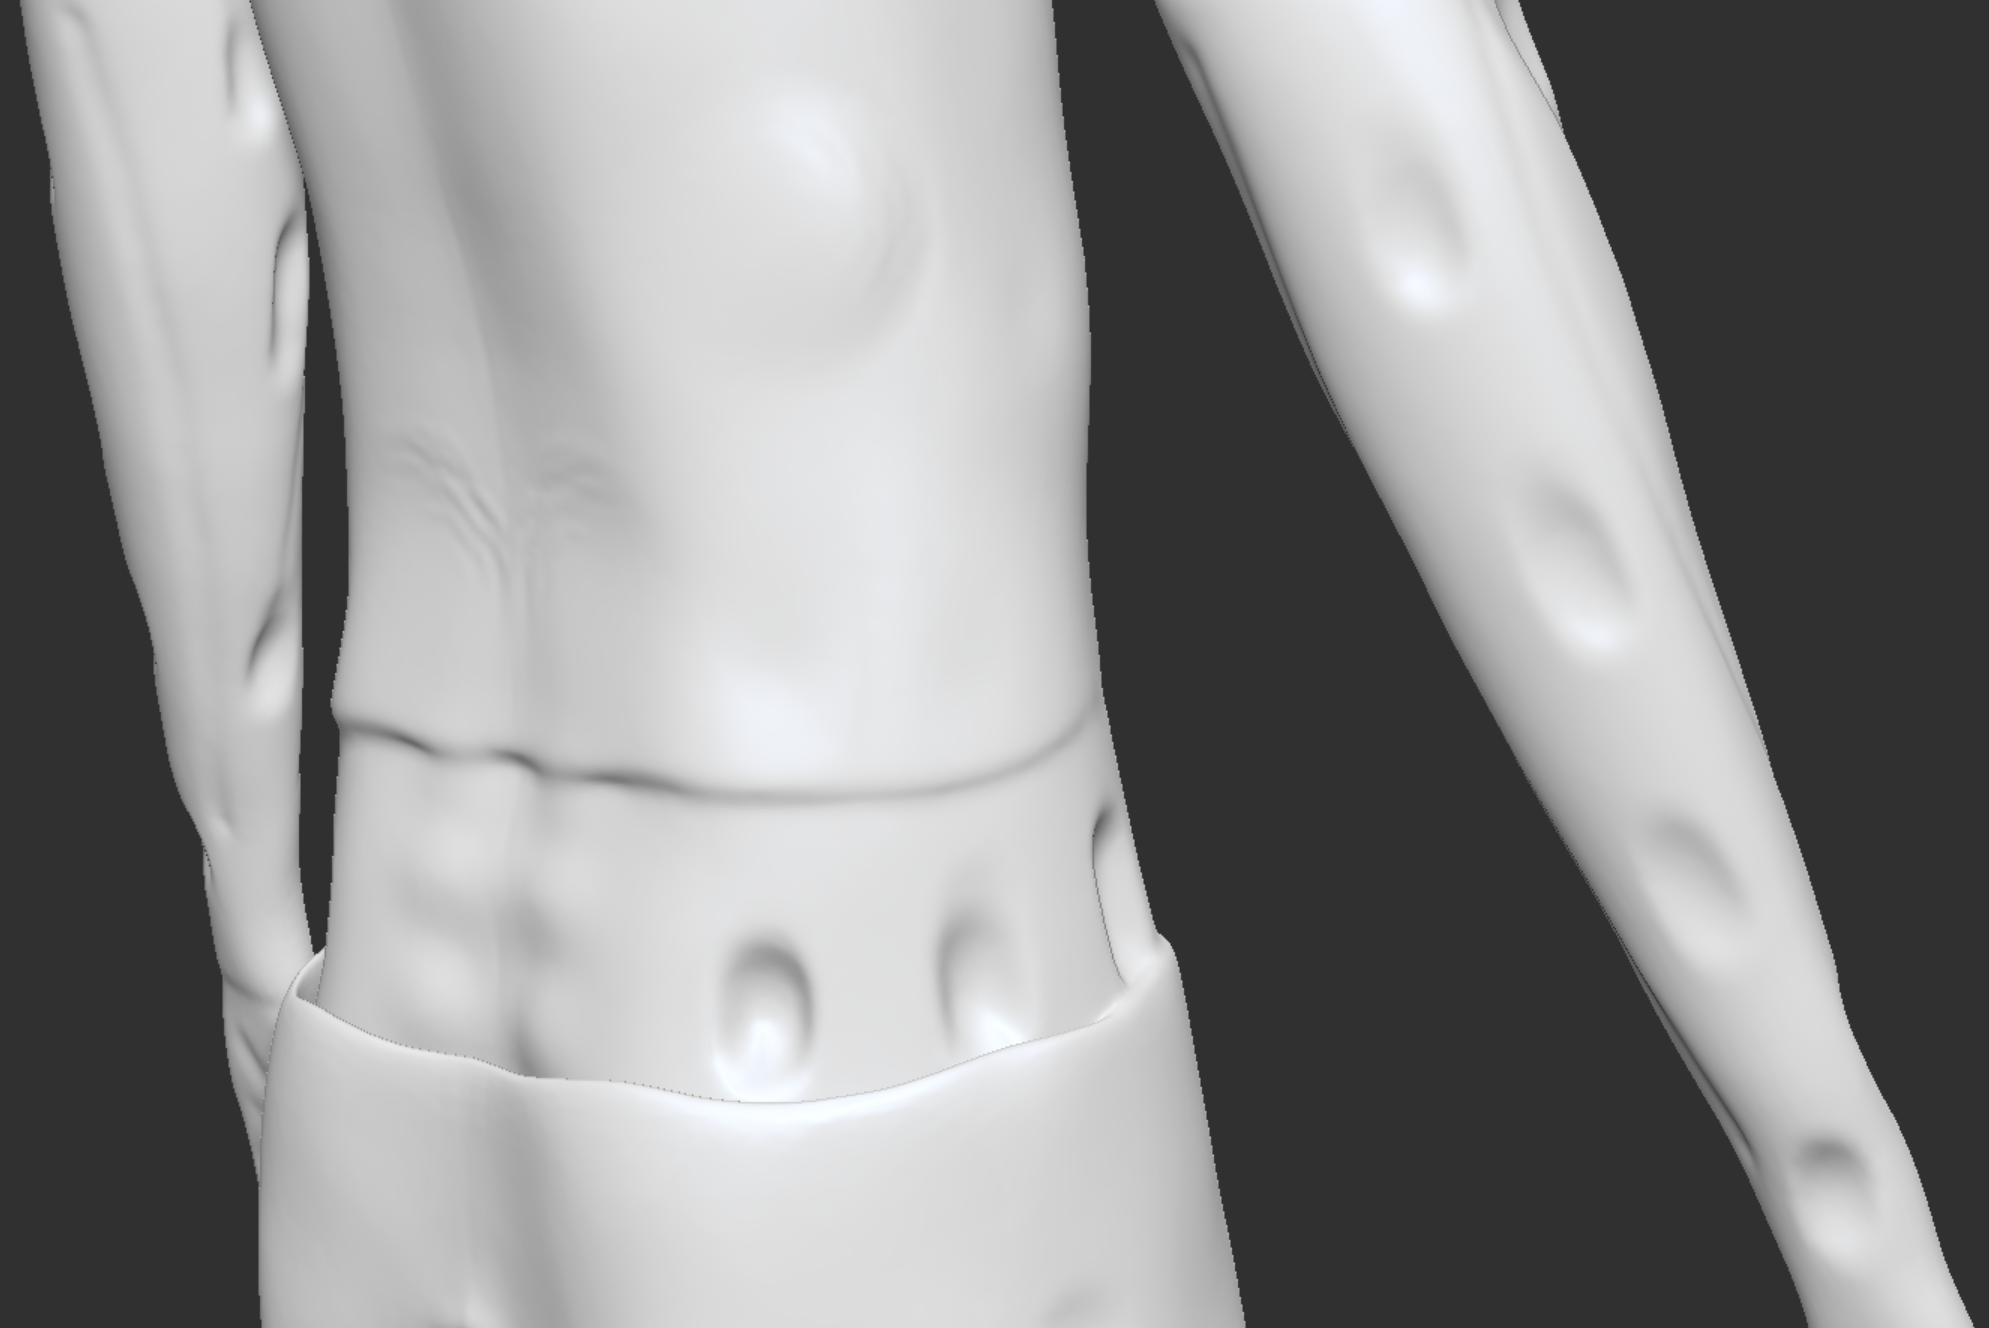
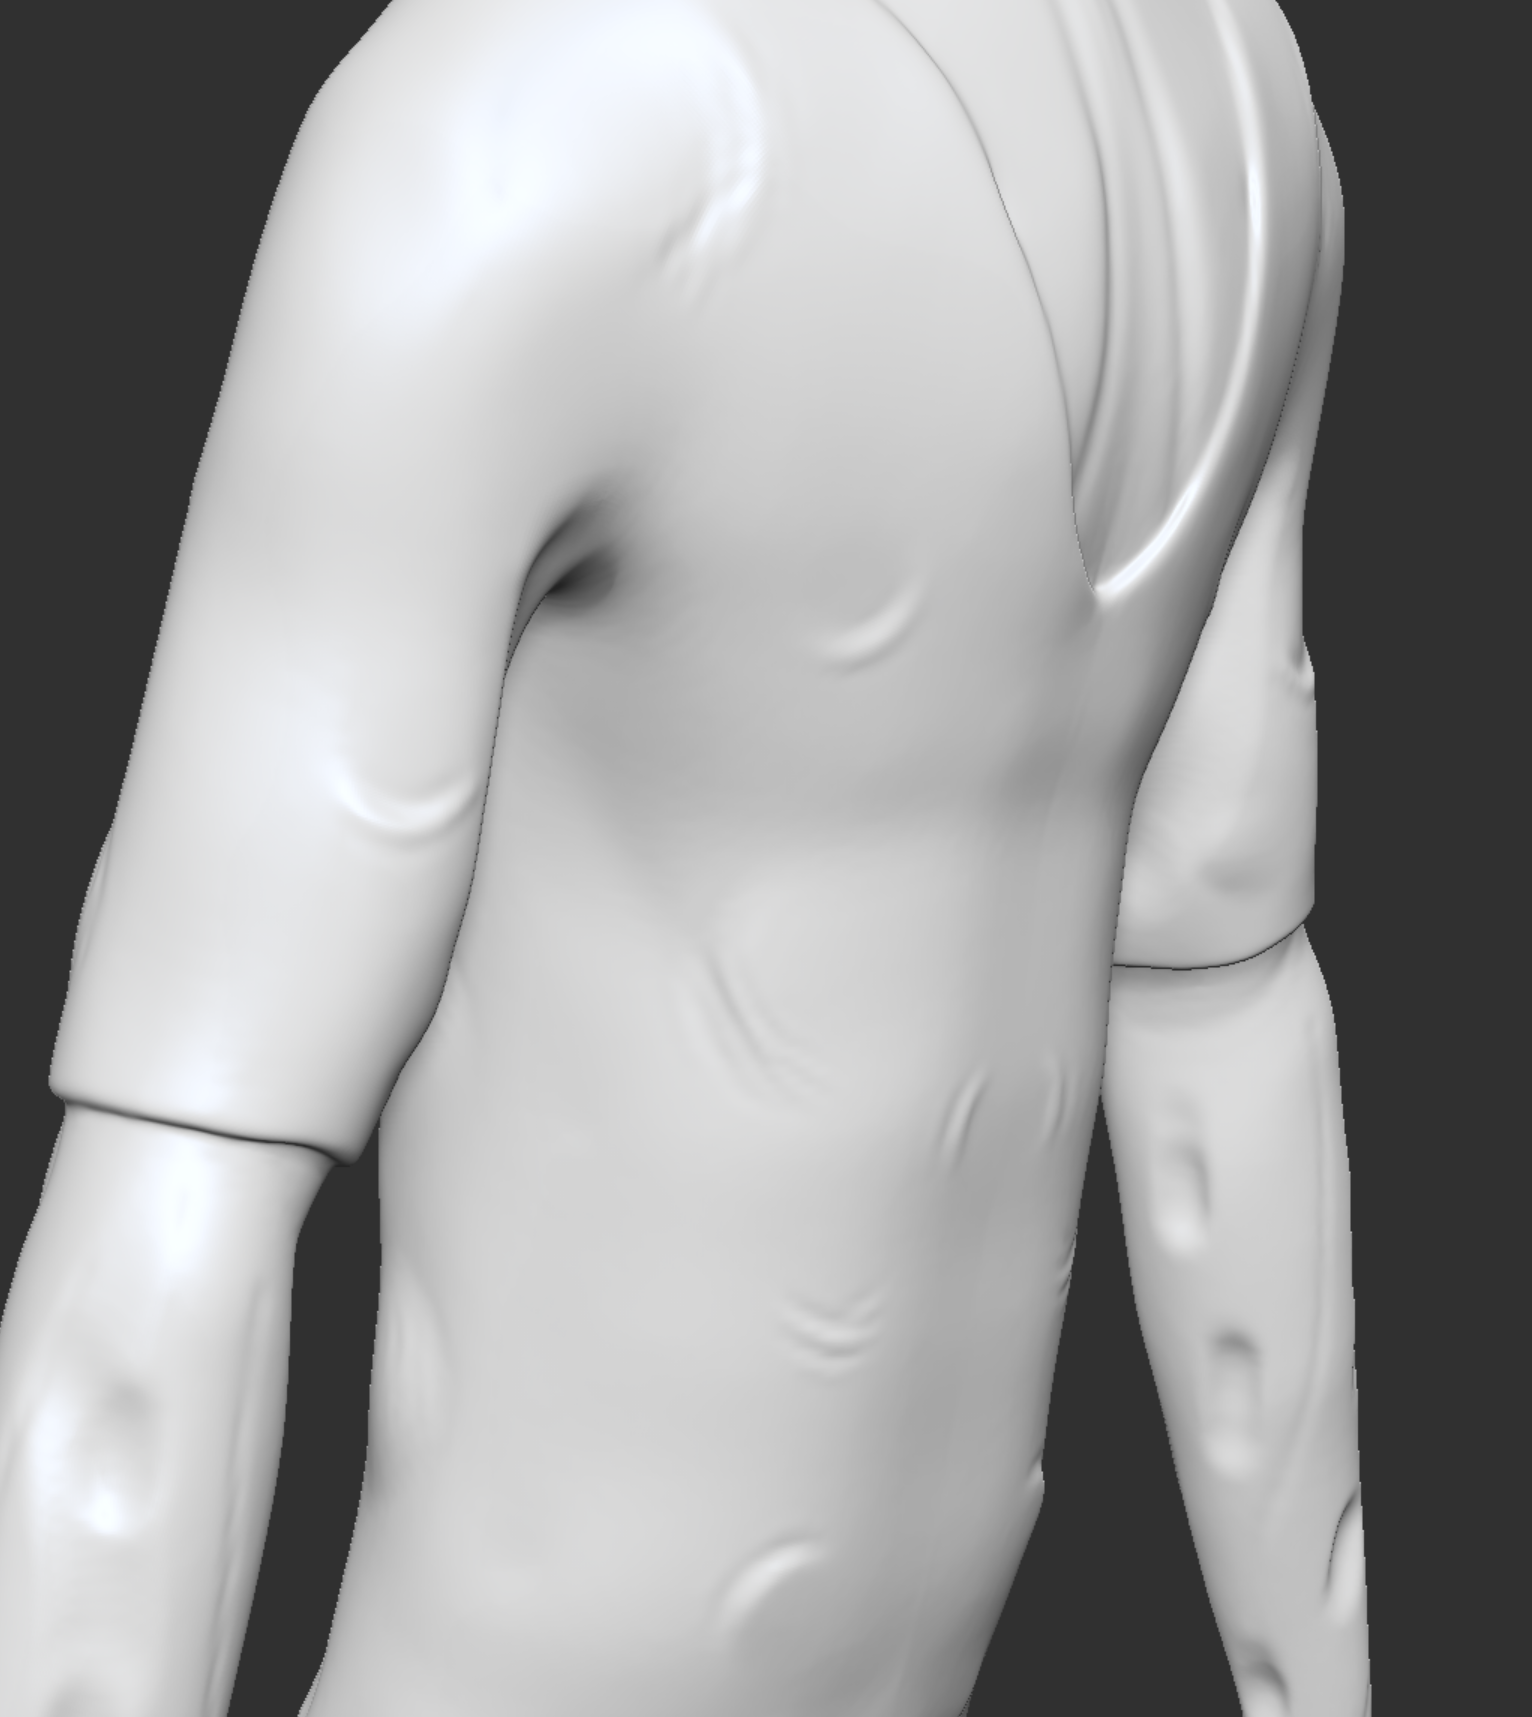
My goal for the skin and body structure was to have a deformed and grotesque look, and an additional element of deformity was included with the indents in the skin. I came up with the idea of adding these indents from the inspiration of Trypophobia. I created these holes by simply using the Clay Build Up brush, but by sculpting into the model instead of adding clay to the model. These holes were added to the majority of the skin.
Clothing and Accessories
There was some experimentation needed for the clothes. I experimented with the thickness of the extraction tool to find the perfect thickness. As the first few times the thickness was either too thin or thick.
After I had extracted the masked area, I used the Cloth Pinch Tool to create subtle creases. I believe this gave a realistic look to the clothing, as I did not want the clothes to look perfect. Additionally, on the trousers I created holes which were made to look like rips. These were added by unmasking pieces of the trousers.
The collar was created by adding a primitive ring and manipulating it’s shape. Then adding cones to act as spikes in order to attach the fingers. The fingers were created by manipulating a cylinder shape and adding detail to make it look like a finger. I then duplicated the finger eight times and placed them on the spikes. However, for each finger I scaled each one differently, to be different shapes and sizes, and rotated each one to make each one face a different direction.

Decimation
The final step was to decimate with the Decimation Master. This process reduces the polycount with triangulation, while keeping the details which have been sculpted. This process also requires the polycount to be lowered to be able to export the model into Maya, as high polycount models will cause Maya to lag. I aimed for a polycount of 450,000, and then exported my model.
Issues
One issue I encountered was after using the ZRemesher tiny holes had appeared in the model after adding clothes. I fixed this issue by filling the holes with the Inflate tool, and then combining and dynameshing the model again to make sure the additional sculpting would stay in place.
Leave a Reply